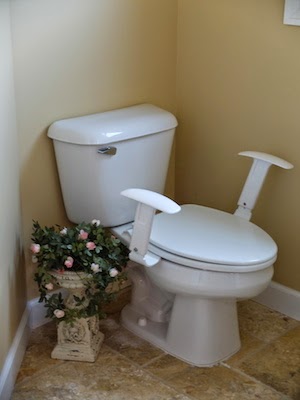
Installing Comfort Arms, armrests for your toilet is an easy way to make getting on and off your toilet safe and comfortable. You’ll be surprised at how much better arthritic knees feel with the extra support of Comfort Arms. Enjoy the video.
SIMPLE, DO IT YOURSELF, WRITTEN INSTALLATION INSTRUCTIONS
Installing Comfort Arms, armrests for your toilet is an easy way to make getting on and off your toilet safe and comfortable. You’ll be surprised at how much better arthritic knees feel with the extra support of Comfort Arms. Enjoy the video.
Remove the 2 bolts that attach the existing toilet seat to the toilet basin. Remove the toilet seat and set it aside. Clean the top of the toilet basin with an anti-bacterial cleaner.
Step 2. Position base plate- Place the Comfort Arms base plate over the toilet basin, aligning the slotted holes in
the base plate with the holes in the toilet basin.
Step 3. Reinstall mounting bolt-Place the toilet seat on top of the Comfort Arms base plate. Reinstall the 2 bolts to secure the toilet seat and base plate. Do not overtighten the bolts.
Step 4. Apply silicon caulk- Place a bead of silicon caulk around the outer edge of the Comfort Arms base plate in
the front and the back. This seals the base plate for easier cleaning.
Step 5. Attach arms at proper height-Slide the arms over the base plate upstands. Ask the person who will be using the Comfort Arms to sit on the toilet seat.
Position one arm to just under his or her bent elbow for optimal comfort and leverage when transferring.
Align the hole in the arm with the closest hole in the base plate upstand and insert the supplied bolt from the inside of the arm.
Install washer and nut on the outside of the arm and tighten until snug. Do not overtighten the bolt. Attach the other arm in the same position as the first.

